
Managing a Traefik web-server with Docker

A few months back I moved away from NGINX and made the switch to Traefik as my SkyeNet.tech reverse proxy. A colleague had recently made the switch for his own web services (check them out at https://z.mk), and was thrilled with the simplicity of Traefik. I too have not looked back since. The integration out of the box with LetsEncrypt for dynamic automated reverse proxy SSL certification is seamless, and I have yet to run into any issues with the setup that were not explainable as user-error.
If you are planning on running containerised services and are searching for a Docker-aware web server, then look no further than Traefik. Here we will get a server up and running with Docker:
Installing Docker-Compose
A full installation of the Docker service and Docker-Compose is required before we can progress with setting up of the web-server. The below details the install process for a Ubuntu 18.04 host:
Install Docker (Ubuntu 18.04)
The below commands will add the official Docker repository to your APT package manager sources, pull an update from the repository and proceed to download the package:
curl -fsSL https://download.docker.com/linux/ubuntu/gpg | sudo apt-key add -

sudo add-apt-repository "deb [arch=amd64] https://download.docker.com/linux/ubuntu bionic stable"

sudo apt update && sudo apt install docker-ce
Installing Docker-Compose (Ubuntu 18.04)
The below will fetch the correct version of Docker-Compose for your system directly from the official GitHub repos to your /usr/bin/ path. You will need to give executable permissions before you can run anything:
sudo curl -L https://github.com/docker/compose/releases/download/1.21.2/docker-compose-`uname -s`-`uname -m` -o /usr/local/bin/docker-compose

sudo chmod +x /usr/local/bin/docker-compose
Setting up Traefik
First of all, you will need to decide where your web services are going to live. I personally like to give the /srv root directory a sense of purpose, but you are free to choose any existing directory on your host. Pick a path, move into the directory and create the 3 empty files as follows:
cd /path/to/desired/installation/diretory
touch docker-compose.yml acme.json traefik.toml
In a nutshell, these 3 files have the respective functions of:
- docker-compose.yml: The all-powerful YAML file used to define service parameters and container networking, for easy Docker deployments.
- traefik.toml: The global configuration file for the Traefik HTTP reverse-proxy service.
- acme.json: A file for Traefik to store Let'sEncrypt SSL certificates.
You should have the 3 files in a dedicated directory, similar to this:
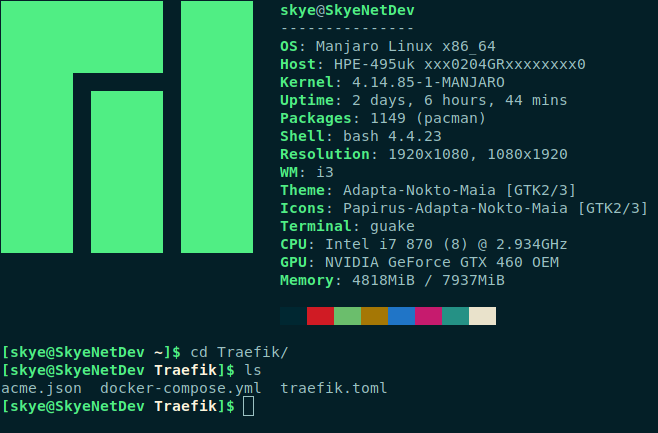
Before you do anything else, you will also need to lock the acme.json file down by running:
chmod 600 acme.json
This will restrict access to the file to Read and Write for only the owner (Traefik will actually refuse to run until this requisite is satisfied).
The acme.json file will remain empty for now, as Traefik will populate this file directly with the challenge keys it generates, however we will need to populate the Compose file and the Traefik configuration file as follows:
docker-compose.yml
version: '2'

services:
  proxy:
    image: traefik:v1.7.6-alpine
    command: --web --docker --logLevel=INFO
    restart: unless-stopped
    networks:
      - web
    ports:
      - "80:80"
      - "443:443"
    labels:
      - "traefik.frontend.rule=Host:traefik.example.tech"
      - "traefik.port=8080"
      - "traefik.frontend.auth.basic=admin:<PASSWORD>"
    volumes:
      - /var/run/docker.sock:/var/run/docker.sock
      - /opt/traefik/traefik.toml:/traefik.toml
      - /opt/traefik/acme.json:/acme.json
networks:
  web:
    external: true
Now to start with the Compose file, there really is not too much going on here. We will pull the image directly from DockerHub and use a network named "Web" (you will need to run docker network create web to create this network before proceeding). Next, you will notice we are exposing HTTP/S ports 80 and 443 for Traefik to listen on.
The next section, "labels", is interesting. So Docker essentially is able to externally tag containers with some text. These labels can be used for some very interesting things, and Traefik has been designed to read labels of other containers to take instructions. The Traefik-specific labels applied here will map the Traefik admin web page to a traefik.example.tech subdomain, and set a password. The final thing we are doing in this file is mounting volumes, or rather essentially giving the container access to read and write to the specified files in our working directory.
traefik.toml
debug = false

logLevel = "ERROR"
defaultEntryPoints = ["https","http"]

[entryPoints]
  [entryPoints.http]
  address = ":80"
    [entryPoints.http.redirect]
    entryPoint = "https"
  [entryPoints.https]
  address = ":443"
  [entryPoints.https.tls]
  [entryPoints.dashboard]
    address = ":8080"

[retry]

[acme]
email = "admin@example.tech"
storage = "acme.json"
entryPoint = "https"
onHostRule = true
[acme.httpChallenge]
entryPoint = "http"

[[acme.domains]]
       main = "traefik.example.tech"
[[acme.domains]]
       main = "subdomain-2.example.tech"
[[acme.domains]]
       main = "subdomain-3.example.tech"

[docker]
  domain = "traefik"
  watch = true
  swarmmode = false
So the above is a short example configuration file, and I'm sure a browse online will help you find tons of inspiration for configuring your Traefik server to fit your needs. For a down-and-dirty summary of the above, we are configuring the server to listen on ports 80, 443 and 8080 (for our optional admin page). The [acme] section requires some administrative details in order to obtain signed certs from LetsEncrypt, and the acme.domains tags will tell Traefik exactly what HTTP/S headers to look out for.
Now, populate your local files with the above in your favorite text editor (Vim!), and make the adjustments as required. Once you are happy with all the details, we are going to have Docker build the app for us with a simple "docker-compose up":

Now, your terminal won't look like this, because I already have the images installed. In fact, you should see a lot of good stuff happening. Once you can see that Docker has successfully pulled the images, and no major errors have been thrown, you should be free to close the containers down again with CTRL+C, and rerun them in the background with:
docker-compose up -d
Voila, we have our first Docker container!
Working with Docker
Running docker ps -a will show you all of your containers, and will give you the running status and networking of your containers with their associated ID. With this ID, you can manage containers directly with standard Docker commands:
docker stop <ID>      # Stop container
docker start <ID>     # Start container
docker logs <ID>      # View container logs
docker exec -it <ID> <command>      # Run command in container (e.g. Bash)
...and more. Read the docker man-pages and do your own research to better get to grips with docker.
As for Docker Compose, you will be able to manage your linked containers much easier by simply using docker-compose commands within the same directory as the docker-compose.yml file:
docker-compose up -d     # Rebuild and start containers in background
docker-compose down      # Stop and delete containers
docker-compose start     # Start containers without updating
docker-compose stop      # Stop containers without deleting
docker-compose logs      # View container logs
Again, there is much more to Docker and Compose than the above, but this will get you started managing your containers.
Setting up our first app
And now we have our reverse proxy up and running, we are ready to start building our backend applications. I have chosen to deploy a NextCloud service here, because this is a truly awesome FOSS project. A true self-hosted cloud storage solution, with all the custom integrations and enhancements you can dream of, and polished mobile apps to boot!
Now, in a similar to fashion to our Traefik deployment we will need to build our compose file for the NextCloud service. Back out of your Traefik directory, and create a new directory for NextCloud. In here, create a docker-compose.yml file as per the below:
docker-compose.yml
version: '2'

volumes:
  nextcloud:

services:
  nextcloud:
    image: nextcloud
    volumes:
      - nextcloud:/var/www/html
    restart: always
    labels:
     - "traefik.backend=nextcloud"
     - "traefik.docker.network=web"
     - "traefik.frontend.rule=Host:nextcloud.example.tech"
     - "traefik.enable=true"
     - "traefik.port=80"
    networks:
     - "web"

networks:
        #db:
  web:
    external: true
Similar to that of the Traefik Compose file, here we will pull the image from DockerHub and apply the same Docker labels to the container, allowing Traefik to autodetect it. We will map the container to a nextcloud.example.tech subdomain for Traefik HTTP redirection, and network it within the "Web" network.
As an aside, all Docker networks are legitimate internal private TCP/IP subnets, and are allocated an entire /16 within the 172.16.0.0/12 private scope by default. All of this is entirely up to you to customise if required. docker network ls and docker network inspect <network> will show you more detail into your configured container networks.
Save and exit the docker-compose.yml file, add a [[acme.domain]] entry to the traefik.toml configuration file matching the subdomain in your docker-compose.yml, and then spin up the app with docker-compose up -d. We are super confident with Docker now (enough to run in directly in the background), but we can still monitor the progress of the build with docker-compose logs. Once all is up and running, give Traefik and LetsEncrypt a few minutes to sort their business out and then try browsing to nextcloud.example.tech.
At this point, you should be welcomed to a login screen, where you can begin setting up your Admin account and initialising the app. Before long, hey presto:
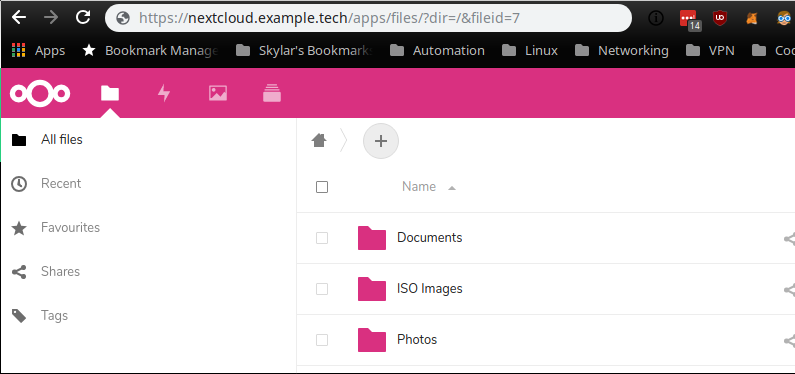
Notice the valid LetsEncrypt-issued SSL certificate:
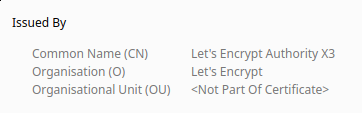
Now it is time to take a break and give yourself a pat on the back. You have an internet-facing web-server with SSL-secured encrypted traffic, and a containerised app running in Docker. Well done!
We have a couple of Docker containers at this point, and you will know by now whether Docker is the right solution for you. If you do wish to carry on using Docker, I would highly recommend spinning up a Portainer instance. Use the below Compose file for inspiration:
docker-compose.yml
version: "3"

services:
  app:
    image: portainer/portainer
    volumes:
      - /var/run/docker.sock:/var/run/docker.sock
      - /var/data/portainer:/data
    networks:
      - web
    labels:
      - traefik.docker.network=web
      - traefik.frontend.rule=Host:portainer.example.tech
      - traefik.port=9000
      - traefik.backend=portainer
    command: -H unix:///var/run/docker.sock

networks:
  web:
    external: true
Save the file, add the [[acme.domain]] and docker-compose up -d. Browse to your assigned subdomain, and you should be greeted with the Portainer host Dashboard:
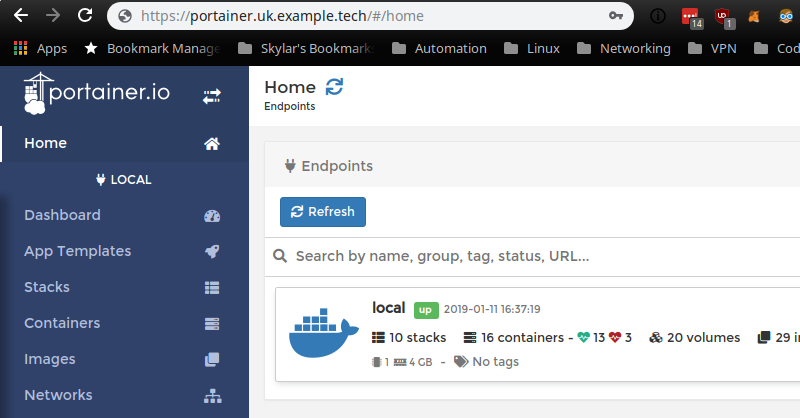
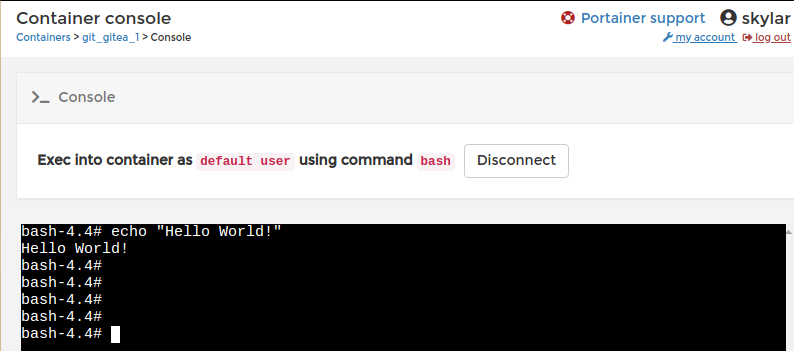
Now, Portainer is a fantastic tool, and will allow you to spin up Docker apps at the touch of a button. Modifying networks, making config changes and consoling into containers is now just a few clicks away:
If at any point you are having troubles, move into your docker-compose.yml directories and run docker-compose logs to view what the containers are reporting. Modern open-source projects are astounding great at raising legible logs, but otherwise simply pasting into Google will find you a fix 90% of the time.
Else, your issue may be related to your host firewall, your domains DNS resolution, your routing...anything really. You're on your own from here, buddy.
For the rest of you, what next? How about our own GitHub alternative...?
docker-compose.yml
version: '3'

services:
  app:
    image: gitea/gitea:latesttheme
    restart: always
    environment:
      - USER_UID=1000
      - USER_GID=1000
    networks:
      - web
    volumes:
      - ~/data/gitea:/data
    ports:
      - "2221:22"
    labels:
      - "traefik.enable=true"
      - "traefik.backend=gitea"
      - "traefik.docker.network=web"
      - "traefik.frontend.rule=Host:gitea.example.tech"
      - "traefik.port=3000"
networks:
  web:
    external: true
Save the file (:w), exit out (:q) and (say it with me!)...docker-compose up -d!!!
You should have gotten to grips with the fundamentals by now, and I'm hoping you will return the favour and recommend me some good self-hosted projects in the future!
So this has been a quick run through of managing a Docker, Traefik and LetsEncrypt stack. This has covered quite a few interesting topics in a very short amount of time, not one of which has been given the depth it deserves.
Nevertheless, I hope it has worthwhile, and thank you for reading!